Every product undergoes rigorous testing before its launch. Different kinds of tests are available and conducted in specific chambers. The UV weather chamber test is prominent among those. It tests the product by simulating real-world conditions. However, many ask how to commence the test using a UV weathering chamber.
Indeed, this testing chamber is not very famous, so the masses have less awareness. The chambers expose the product to UV rays by producing light through artificial light sources. This method tracks the performance of products under different parameters.
Different industries use these UV weather chamber tests. The products made from polymers, such as paints, coatings, etc., undergo the UV weathering test. The reason is that these products remain under sunlight and UV rays. Their testing tells how good they will be when launched. Let’s go into detail and discuss their commencement.
Overview of UV Weathering Chamber
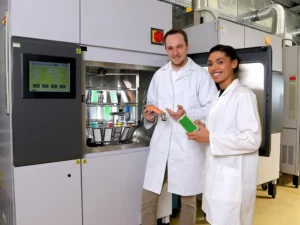
A UV weathering chamber is a testing device. The product in this chamber faces UV rays, moisture, and rainy conditions. Under such parameters, products can behave differently. The operator checks and analyzes the product’s performance. A durable product remains in good shape, and vice versa.
This testing chamber is very modern and has many built-in features. Generally, the available environment chambers test the product from one perspective. For example, the thermal chambers check products from a heating point of view. Similarly, the vibration chamber tests the products.
However, these UV weathering chambers test the product in terms of different parameters. Those include UV rays, temperature, moisture, and rainy conditions. Generally, the products undergo this testing and remain outdoors under the sunlight. The UV rays from the sunlight can start the chemical reactions in them.
Due to this chemical reaction, the quality of the product goes down. So, manufacturers always want to make products resistant to UV rays. But how would they know if they have made something resistant to UV rays? You bet it right! These UV weathering chambers test the durability and resistance of the products.
Components of Weathering Chamber Testing
The UV weathering chambers consist of different components. Without these parts, their work is impossible. Before the commencement section, let’s first understand their fundamental parts. Comprehending them will give you a better idea of their functionality.
- UV Lamps: These lamps provide UV radiation. As you know, the product undergoes UV rays in the real world. So, these lamps in the chamber provide UV rays to simulate real-world conditions.
- Temperature Control: The chamber’s temperature can go high due to UV rays. However, such a higher temperature is not needed for this testing process. So, there must be a system to control temperature to simulate real-life conditions. So, the chamber uses a temperature control system.
- Humidity Control: A product can go under different humid conditions. Dew, rain, and other conditions are typical that a product usually faces. So, these humidity control systems provide dew and rain drops to test the product. Some chambers contain small water boxes for spraying water drops.
- Sample Holders: This is a kind of clamp. The product under test is mounted on this holder. It keeps the product at a steady position. So, when it faces UV rays, moisture, or water sprays, it remains stable at its position.
- Control Panel: This is one of the significant components of the UV weathering chamber. Some people call it HMI (Human-Machine Interface). It allows the operator to adjust different parameters. In simple words, it gives complete control to the operator.
Step-by-Step Process of Commencing Test Using UV Weathering Chamber
The commencement of this UV weather testing involves some easy steps. Using this chamber for testing is indeed very straightforward. You don’t need to be a pro. Instead, a gentle experience will prepare you to run this test. Let’s dive deep and discuss the steps involved.
1- Prepare Material
First, the product that you want to test must be clean. If it contains any impurity, the test’s accuracy will be unsatisfactory. The reason is that those impurities present in the product can give it different properties. So, under the test, the product can deviate from its original conditions.
Not only is the product under test, but the chamber itself should also be cleaned properly. If you find anything that could alter its temperature, remove it immediately. These impurities can affect the accuracy of the tests. Once the chamber is ready, it is time to put the sample in it.
After cleaning the product, mount it on the sample holder.
2- Setting Up the Chamber & Position the Samples
Keep in mind that the chamber consists of different components. You should ensure that all those components, including the sensor, work nicely. The UV lamps are of the utmost importance. They act as UV rays in the chambers. If they malfunction, you should not conduct the test before changing them.
These UV rays generally emit two types of rays, which differ in their wavelength. UVA (315–400 nm) and UVB (280–315 nm) are those types. You might think that some UV rays are hazardous as well. You’re betting it right, but these lamps can filter those UVC rays. This is why these lamps. Not only lumps, but you should check all other compnents as well.
As I said earlier, the UV weathering chamber comprises a sample holder or clamp. You should mount your product on the holder. This holder will keep the product in one stable place. Water drops or other elements will not affect its position. Moreover, the production will face UV rays from all directions.
Quick Tip: This mounting is crucial as it gives the product stability. UV rays and moisture will hit the product equally. If your product is too big, I recommend cutting it into small pieces. Your product must fit on the sample holder. Moreover, if you are testing two products simultaneously, mark them. This marking will ease the analysis process.
3- Set the Test Parameters
Once the sample is on the clamp, it is time to set the parameters. In the UV weathering chamber, you can adjust multiple parameters. Those include temperature, UV ray intensity, water sprays, and humidity. You might need clarification about what level we should set for these parameters.
This depends on the production. If your product is supposed to be in harsh conditions, the parameters should be more strict. Similarly, if the product remains at room temperature, the parameters’ intensity should be more gentle.
How do you adjust these parameters? These UV weathering chambers come with dedicated control panels. It is also known as HMI (Human-Machine Interface). You’ll be able to set the parameters’ values using these control panels.
4- Start Test & Monitor it
Once the parameters are set, you are good to start the test. Switching on the chamber will start to work and quickly achieve the set parameters. The duration of testing depends on the product’s usage. If a product will be used in harsh conditions, it will need more time in the chamber.
The reason is that the product will face real-world conditions for longer. Suppose you have a product that will remain under the sun most of the time. It could be anything, like paints or any other product. So, it will face UV rays for the whole day when in use.
You should keep this product under test for an extended duration. This will give it UV rays exposure for a longer period of time. Moreover, moisture, humidity, and other elements will also count for a long duration. Thus, you’ll be able to assess how the product will behave when it goes out to the masses.
5- Analyzing the Results
During the test, exposure to UV rays, temperature, and humidity will change the quality of the product. Generally, ultraviolet radiation starts the chemical reaction in the products. If the product is strong, it will not degrade. However, if it is weak, it will start to deteriorate.
UV rays, sprays, temperature, and humidity will also affect the product. Upon completion of the test, you should analyze the result. If the product remains in good shape, it indicates its durability and strength. However, it is not of the highest quality if it is deteriorated. It should not be approved to go into the market.
Benefits of UV Weathering Chamber Test
The UV weathering chamber test has many benefits. By reading the above portion, you will know how beneficial these chambers could be. Their fundamental purpose is to ensure the quality of the products before they go to the public. Let’s discuss a few of their pros:
- First of all, chamber testing allows you to assess the product. A product that goes into the market without testing is unsuitable for brands. Its failure during use by the customer will hurt the brand’s reputation. So, this testing ensures the product is checked before its launch.
- Some products need their lifespan listed on the labels. So, how would a manufacturer estimate the life of the product? In such a case, this UV weathering testing comes in handy. The manufacturer conducts this test and checks how long a product remains in good shape. This helps them list the lifespan of the product.
- As I said, the product undergoes strict monitoring during these testing. This allows manufacturers to identify the faults and weaknesses of the product. In this way, they can improve their products and offer better quality to their customers. In the end, they earn good customer respect.
- Generally, the manufacturers have to hire a specialist quality assurance team. They check the product’s quality and approve it for market entry. Hiring such a team adds additional cost. However, a product that undergoes UV weathering testing does not need quality assurance. Testing itself is an assurance of its quality. So, it saves manufacturers a lot of money. Moreover, these tests are reliable and accepted worldwide.
Conclusion
UV weathering chambers are very useful. Products such as paints, or consisting of polymers, are weak to face UV rays. So, testing them is very important to ensure their quality. The manufacturer can check the performance of the product under different parameters. A robust and durable product quickly passes the test. However, weaker products fail and go back for improvement.