Testing the hardness of any material is paramount for its applications. Without determining the hardness, it would be unwise to use the material. Hardness controls many other characteristics of materials. However, different types of hardness tests are available.
Each of those hardness tests varies in the way they measure hardness. This makes the selection process very daunting and tricky. However, understanding how those tests work will make things much more manageable. Right? Manufacturers use a few of them depending on their needs. Let’s jump and discuss each of those tests.
Overview of Hardness and its Testing

Before we dive, don’t you wonder why we need to measure the hardness of the material? After all, this measurement brings us to discuss these various tests. Measuring the hardness is crucial when selecting material for your project. But what is hardness itself?
Hardness is the ability of any material to resist the force or deformation. That is a typical dictionary-based definition. But in routine life, we take it as the ability of a material to withstand wear and tear. It defines how good or strong a material will be. Hardness indicates the durability of materials.
Let’s discuss the importance of hardness measurement. Testing and knowing the hardness gives us valuable insight into the material. It tells whether a material will be durable or suitable for any specific application. Keep in mind that this rigidity influences many other characteristics of materials. For example, stiff or rigid materials are resistant to wear and tear.
It can easily bear stress and does not break easily. Conversely, materials with less hardness are weak and prone to wear and tear. That’s why it becomes essential to measure hardness. It indicates how strong a material will be during use. Knowing one hardness helps engineers estimate other characteristics of the material.
Different Types of Hardness Testers
I’m sure that you have a better idea of why hardness testing is critical. Let me spill another tidbit: there are a variety of hardness tests. Each of them uses different tools or machines to get the test done. Using them requires you to know their way of working.
Here is the list of most common hardness tests:
- Rockwell Hardness Test
- Brinell Hardness Test
- Vickers Hardness Test
- Knoop Hardness Test
- Leeb Hardness Test
- Shore Hardness Test
- Webster Hardness Test
Each of these tests has specific specifications. Let’s examine them and see how they work.
1- Rockwell Hardness Test

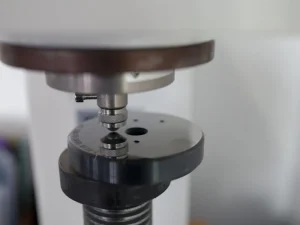
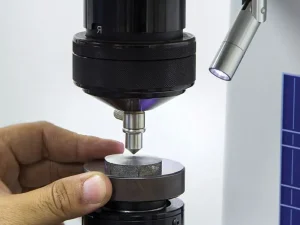
The Rockwell hardness test is more reliable and widely used. A specialized Rockwell hardness testing machine is used in the testing process. Material under the tests undergoes the force or load. The indenter is a critical machine component that puts loads on the workpiece.
The Rockwell test involves using two loads. The first load is generally lower or minor. The second is more intense and higher (major). For example, the operator will use the first load of 10 kg through the indenter on the workpiece. This load will create some penetration on the material’s surface, right?
The operator will measure the depth created by the indenter’s penetration. Once done, the second load will be applied to the material. But this second load will be more intense and higher than the first one. If the first one is 10 Kgf, the second would be 60 Kgf. This load of 60 Kgf will create more depth and penetration.
The operator will again measure the depth created by the second load. Then, he will compare the depth created by two loads. This comparison will give the hardness value. This type of testing is generally suitable for hard metals and alloys. Remember, different Rockwell test scales are available and ideal for testing various materials.
You might be confused about the load and its value. Generally, these first and second loads depend on the Rockwell scale we used. This scale is different for different materials. Typically, the first load (minor) remains the same. The second or significant load varies. Here is the table showing scales with loads:
| Rockwell Scale | Minor Load | Major Load |
| Rockwell A (HRA) | 10 Kgf | 60 Kgf |
| Rockwell B (HRB) | 10 Kgf | 100 Kgf |
| Rockwell C (HRC) | 10 Kgf | 150 Kgf |
2- Brinell Hardness Test

The Brinell hardness test is not new and has been used for many decades. This test involves applying force to the material through steel or carbide balls. This carbide ball is used in the indenter. A strong force of at least 3000 kilograms is applied to the material’s surface.
This extreme force creates an indent or depth. Measuring this depth gives the Brinell hardness. It is not as simple as it may sound. Many factors determine the final Brinell hardness of any material. Those include dwell time, force applied, the depth created, etc.
One thing I like about this Brinell hardness test is that it gives a single hardness value for materials. Unlike the Rockwell test, there aren’t multiple hardness scales in the Brinell test. All you need to do is to place a sample on the hold. Apply the force and do simple calculations. Here is the list of some Brinell hardness of some materials.
| Material | Brinell Hardness Number (BHN) |
| Softwood (e.g., pine) | 1.6 HB |
| Pure Aluminum | 15 HB |
| Copper | 35 HB |
| Mild Steel | 120 HB |
| Rhenium Diboride | 4600 HB |
HB in the table indicates the “Hardness Brinell.” The name of this test is a kind of tribute to its inventor, Dr. Johan August Brinell. A variety of Brinell testing machines are available, and their pricing varies. Generally, this test is suitable for thick and strong materials as it applies extreme force.
3- Vickers Hardness Test
This test was invented in 1924. It is slightly different from other methods as it does not care about the depth created on the material’s surface. Instead, it is more related to the size of the indentation. Let me explain this test in more detail. The Vickers hardness machine consists of an indenter with a pyramidal diamond shape.
The operator applies force on the surface of the material with this pyramidal diamond indenter. This force creates an indentation on the surface of the material’s workpiece. Now, the manufacturers measure the sizes of this indentation. Keep in mind that this indentation will have a diamond shape just like the shape of an indenter.
This test is also used for small pieces and parts, so indentions can be small. Therefore, operators use microscopes to analyze the size of the indentation. Once the indentation size is measured, values are put into the formula, which involves different parameters.
This formula and calculation give the operator the accurate hardness of the material. Like the Brinnel test, this method uses a single scale, which makes it simple for laymen to understand the result. As it involves measuring the sizes of tiny indentations, it is also called a microhardness tester.
4- Knoop Hardness Test
This test is similar to Vickers hardness to some extent. It uses a diamond indenter with an elongated, rhombohedral shape to create an elongated indent. Generally, this test is suitable for small materials. The operator observes the diamond-shaped indentation utilizing a microscope.
First, the material is placed on the machine’s holder. A small force of around 1 kg or even less is applied. This force creates a more elongated indentation. So, the operator does not measure the whole size of the indention. Instead, he measures the long diagonal length and analyzes and calculates.
Keep in mind that this Knoop test involves the calculation of hardness through a formula. What I like about this test is it can test the hardness of thin, small, and brittle materials. Generally, all other hardness tests apply a high force that makes the material prone to breaking. But this Knoop test works by applying gentle force.
Quick Highlight: The difference between the Knoop and Vickers test lies in the shape of the indenter. The Vicker test uses a pyramidal diamond indenter. On the flip side, the Knoob test uses an elongated indenter. Unlike the Vickers test, the operator only measures the long diagonal length.
5- Leeb Hardness Test
The Leeb test stands out from all other hardness tests. The reason is that it relies on the rebound velocity of the ball (indenter). It uses a hard ball made of tungsten carbide as an indenter. The machine used for this testing is compact and portable.
The machine launches or propels the hard ball or indenter on the material’s surface during testing. The indenters strike on the surface and return. The machines measure the rebound velocity of the ball after the impact. After colliding with the surface, they also check how fast and far the ball (indenter) went.
Calculating and analyzing this measurement gives accurate hardness of the material. So, this test is based on the ball’s rebound velocity after it hits the material. The more rigid the surface, the faster the ball will rebound, and vice versa. This Leeb hardness test is suitable for heavy metals weighing above 5 kg. Its accuracy won’t be reliable if you use a small workpiece.
6- Shore Hardness Test
This test is straightforward to conduct. Its name pays homage to Albert Shore, who first made the durometer device. This durometer consists of round indenters and is used to perform the test. Unlike other tests, this Shore test suits soft materials such as plastics and rubbers.
Let’s discuss how this shore hardness test works. First, the durometer launches or propels the indenter, which strikes the material’s surface and goes inside. Now, the device checks how deep the indenters (round-shaped) sink into the material. The depth at which the indenters sink is used to calculate the hardness.
When the indenter doesn’t go deep, it’s a clear marker of hardness. On the contrary, if the indenter goes deep inside the material, it means the material is soft. There is a shore scale that checks the exact hardness of the material. Keep in mind there are two shore scales, and their names are as follows:
- Shore A
- Shore D
The Shore A scale is employed to gauge the hardness of soft, flexible materials. On the flip side, shore D is suitable for hard materials. Remember, this hard does not mean any metal. Instead, it indicates hardened rubber or plastics. This test does not work on complex, rigid materials like metal and alloys.
7- Webster Hardness Test
As I said earlier, the shore test is only suitable for soft materials. But I’ve brought this Webster harness test if you want to check the hardness of rigid materials. These can be aluminum, brass, or other metals. The Webster tester is similar to pliers and clamps the material under the test.
Once the material is clamped, the operator squeezes the handle of the Webster device. The squeezing produces a force that pushes the indenter on the material’s surface. Due to this push, the indenter creates an indention on the material’s surface. The operators check and analyze this indentation, which indicates the hardness of the material.
This Webster tester is handheld, and the operator keeps it in hand while testing the material. What I love about this test is that it is quick and easy to do. Someone with gentle experience and minimal technical knowledge can conduct this. Moreover, this Webster tester machine is relatively inexpensive, a big plus.
Conclusion
As I mentioned above, knowing the hardness of the material is essential. It helps make the correct use of different materials to make products. However, different hardness testing machines are available. Their working, usage, and prominent features vary from each other.
Engineers and manufacturers use one type of material depending on the material they want to test. For example, a shore test would be the best if they need to test soft material. Similarly, the Rockwell or Brinell tests are suitable for checking rigid materials.